Purchasing and managing a Drill Down Visuals license on the ZoomCharts website
Drill Down Visuals PRO licenses acquired directly from ZoomCharts can be applied manually with a custom theme file or by entering license/key hash. Follow this step-by-step guide to license your visuals and activate the PRO features.
Applying license theme file (.json)
A custom theme file offers a convenient way to apply the license key and hash to an entire Power BI report at once, eliminating the need to enter the key and hash for each visual individually. We highly recommend using this license management method to streamline the process and save valuable time.
Step 1: Locate your theme file
After your purchase, you will have received an e-mail from our
support team with the purchase confirmation which also contains the custom
theme file for licensing your visuals in Power BI. If you haven’t received your
e-mail or you have lost it, please contact [email protected].
Step 2: License your visuals with the custom theme file
Once you have downloaded or located the .json file, follow these steps to add the theme file to Power BI and verify your license:
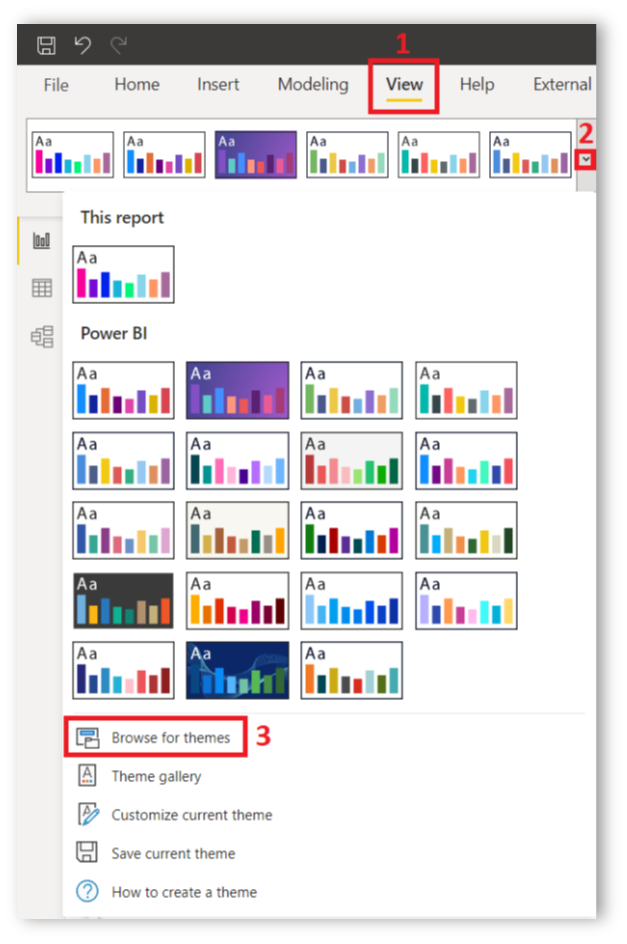
- Select the View tab on the ribbon menu
- Expand the theme window
- Click Browse for themes to load the custom theme file.
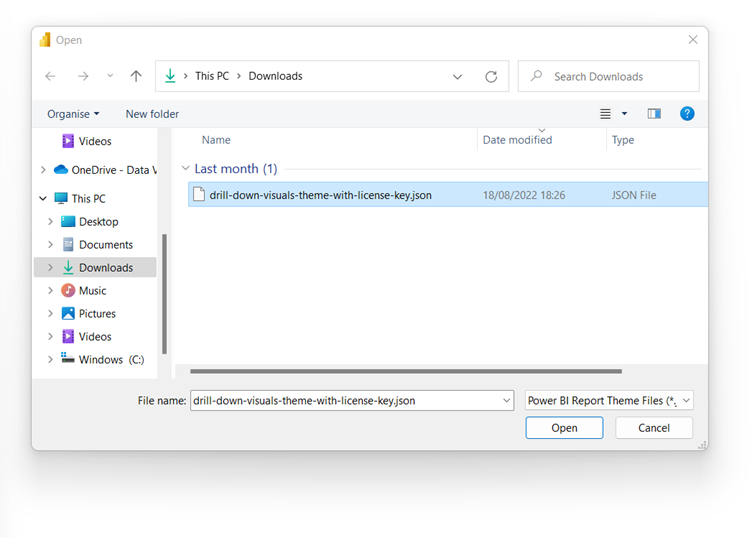
Locate the custom theme file (usually in the Downloads folder) and press the Open button. The custom theme file contains the necessary key and hash to verify the license, so you can start using the PRO features of Drill Down Visuals. Due to Power BI limitations, you will have to repeat this process for every new report you create.
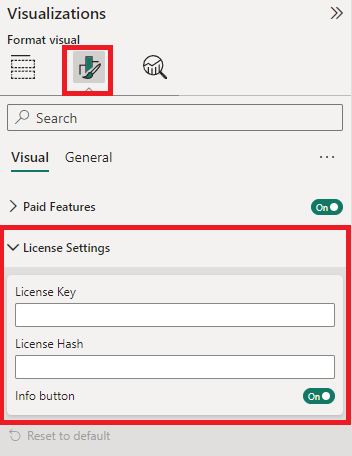
It is always recommended to apply the theme before adding any Drill Down Visuals to your report. However, if you’re using a report template and the visuals keep showing the trial message after importing the custom theme, you can troubleshoot that by opening the License Settings menu in the formatting pane and clicking Reset to Default. This action will clear these fields and override any value that might conflict with the custom theme’s key and hash.
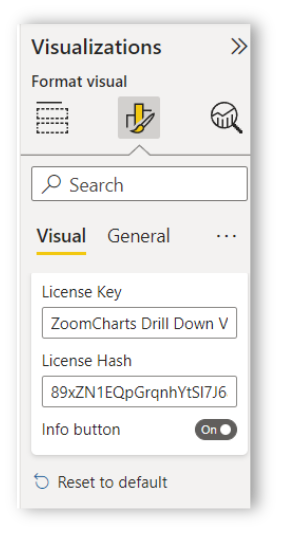
If your company already uses a custom theme file, it can be seamlessly merged with the license theme file. You can handle the merging yourself, or if you need assistance, feel free to send your theme file to [email protected], and our team will gladly help you with the process.
Adding ZoomCharts visuals to Power BI
Once the theme has been applied, add Drill Down Visuals to the report and start using them. See the instruction here.
Applying license key and hash manually
If you choose to manually enter the license key and hash for each visual, you can do so by opening the visual’s settings, navigating to the License Settings section, and entering the details there.
Step 4: Add Drill Down Visuals to Power BI
Press the Download button on the AppSource product page to download the .pbiviz file. Afterwards, open Power BI and press the ellipsis icon in the Visualizations panel. Press Import a visual from a file and locate the file you just downloaded. The visual’s icon will appear in the list of visualizations.
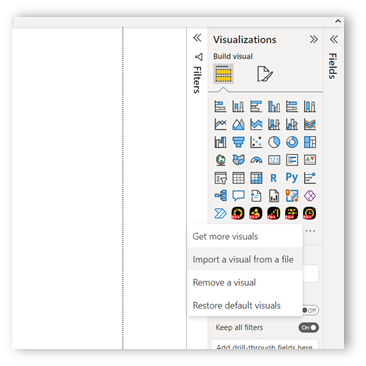
Alternatively, press Get more visuals if you want to browse AppSource within Power BI and download the visual directly. Enter the name of the visual into the search bar, open the product page and press Add to download it.
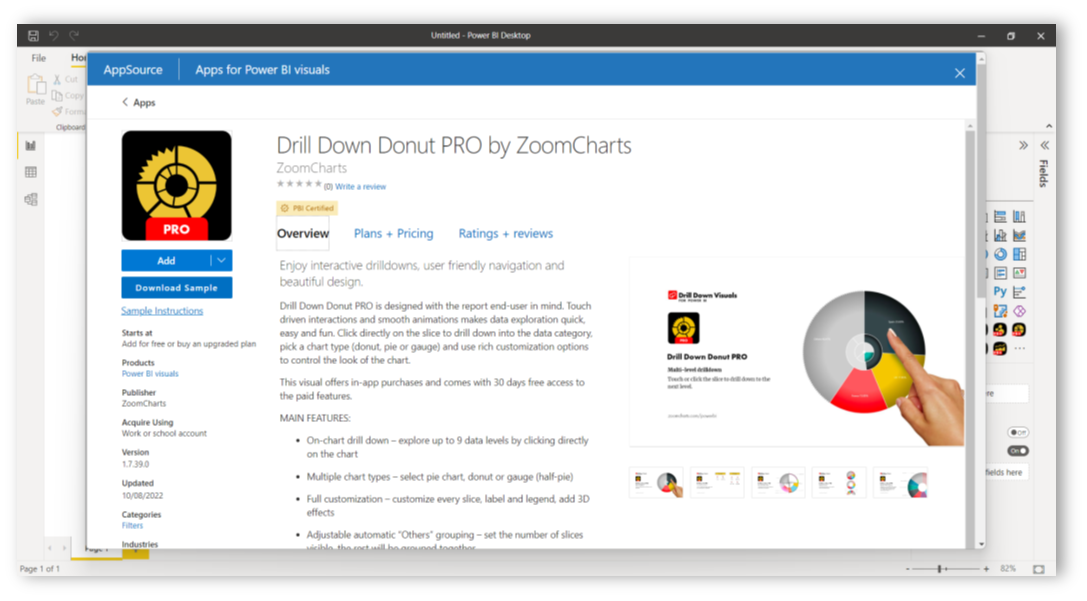
Afterwards, you can import your dataset and start creating your report.
Was this helpful? Thank you for your feedback!
Sorry about that.
How can we improve it?