Lasso Tool
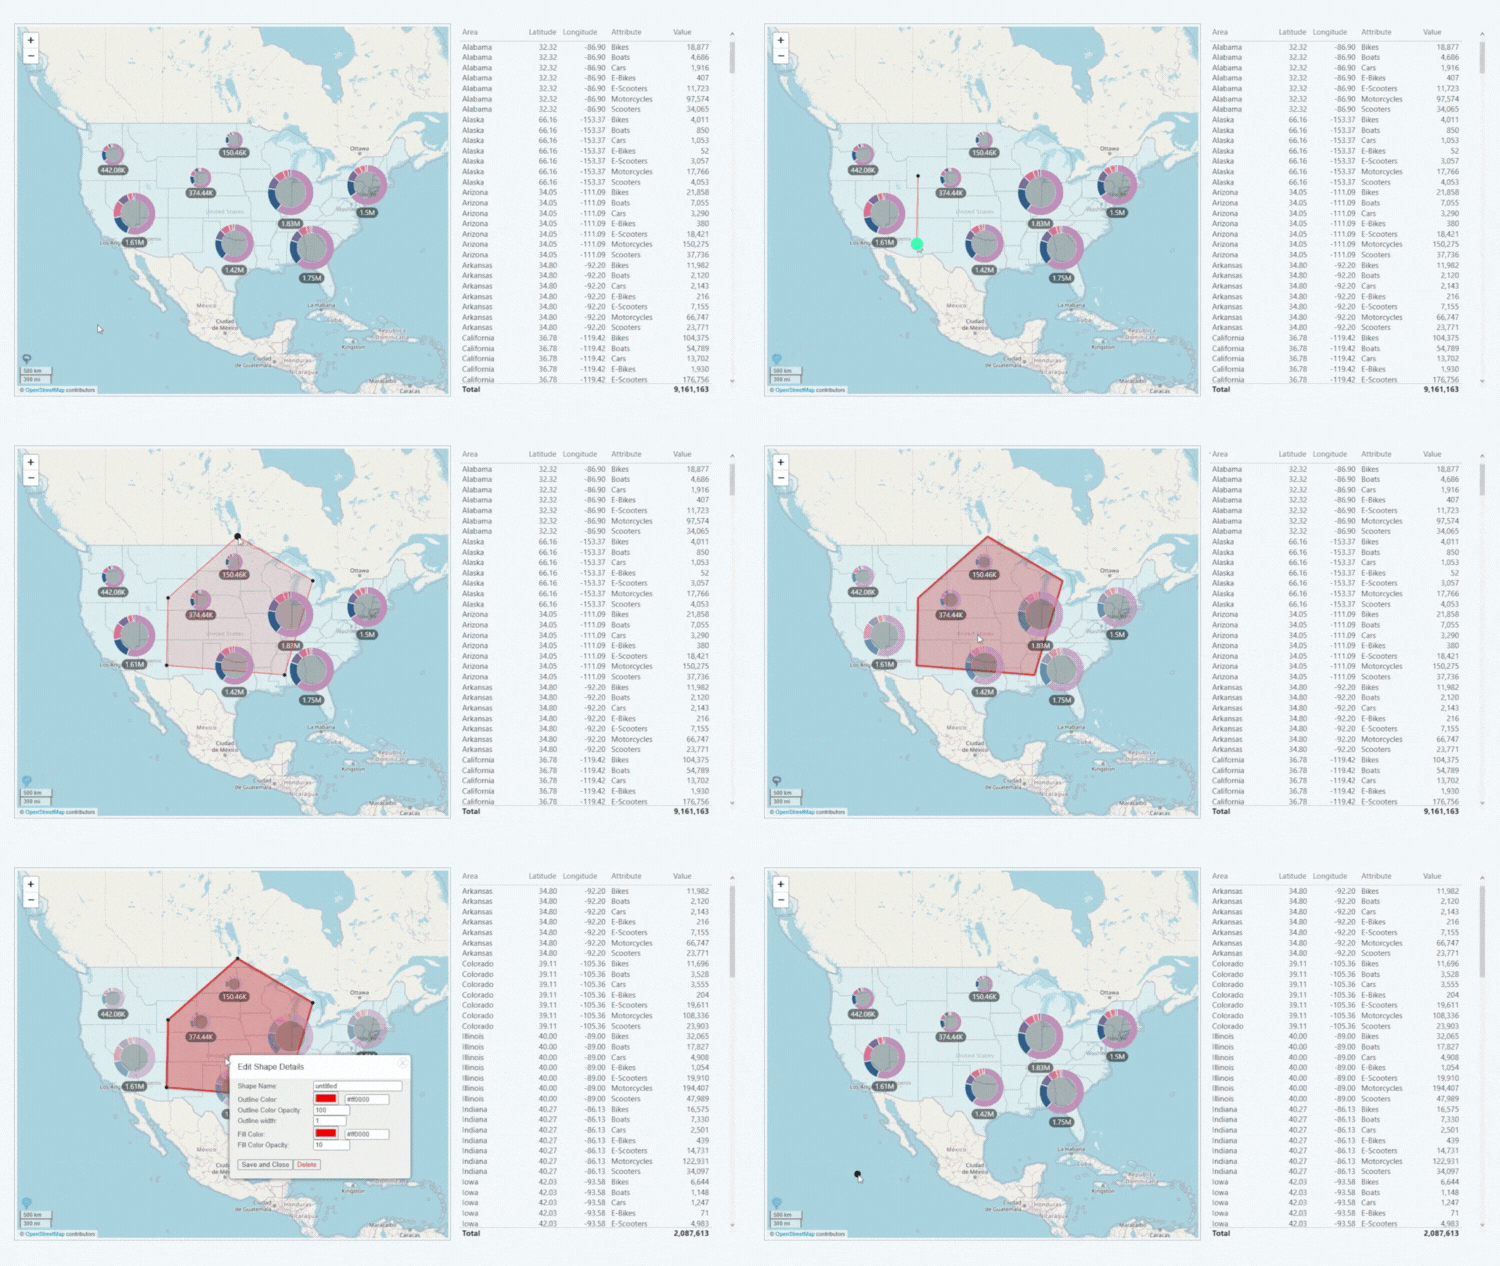
If this toggle is enabled, the visual will display a Lasso Tool button on the bottom left corner of the map. Users can press this button to activate the Lasso Tool, which allows them to draw custom shapes on the map.
To create a custom shape with the Lasso Tool, the user must press the toolbar button to enable the lasso selection mode, left-click their desired shape boundaries, and then close the shape by pressing the toolbar button again.
Shapes can be moved by pressing the Lasso Tool button again and dragging a shape while holding left click. Users can access the shape customization menu by selecting a shape while the Lasso Tool mode is disabled, and then enabling the Lasso Tool mode and right-clicking the shape. This menu can be used to enter a custom shape name, customize fill or outline color and opacity, or delete the shape.
User-created Lasso Tool shapes will behave similarly to the pre-made Shape Layers, allowing the user to create custom selections and filters on-the-fly. Custom Lasso Tool shapes will persist on the user’s instance even after pressing the Reset button or refreshing the report page, however these changes are made locally and will not affect hosted reports or the data source.

Was this helpful? Thank you for your feedback!
Sorry about that.
How can we improve it?